このブログは xserver 上の wordpress ですが、以前から wordpress は巨大すぎると感じていました。
このブログも、それほど膨大な内容でもないのですが、バックアップは 10 GB くらいにはなると思います。
テーマやプラグインはできるだけ減らすようにしていますが、それでもかなり大きくなっておりバックアップが大変かなと感じていました。
xserver の wordpress が遅いと感じたことはあまりありませんが、そんなに速く動くわけでもありません。
最近、Gatsby を少し触るようになって、Gatsby + GitHub + Netlify で無料の爆速ブログを作成できるとのネット記事をみてやってみようと思いました。
まずは、GitHub からです。
ローカルに git をインストール
環境は linux mint 21.3 です。
git をインストールして確認します。
sudo apt update
sudo apt install git
git --version
github 用のディレクトリを作成します。
mkdir github
cd github
mkdir sample
cd sample
Git にアカウントを設定します。
git config --global user.name "YOUR NAME"
git config --global user.email awesome@company.com
linux 用?の設定。
git config  --global core.autocrlf false
git config  --global core.quotepath false
アカウントの確認。
git config user.name
git config user.email
Personal Access Tokens の取得
3 年ほど前に GitHub のユーザー登録をしたのですが、これまでほとんど利用してきませんでした。
ログインしてみると以前アップしたファイルがあり、それをローカルにクローンしようとしたのですが、以下のようなエラーが。
git clone https://github.com/moheno/homepage
Cloning into 'homepage'...
Username for 'https://github.com': moheno
Password for 'https://moheno@github.com':
remote: Support for password authentication was removed on August 13, 2021.
remote: Please see https://docs.github.com/get-started/getting-started-with-git/about-remote-repositories#cloning-with-https-urls for information on currently recommended modes of authentication.
fatal: Authentication failed for 'https://github.com/moheno/homepage/'
どうやら、Personal Access Tokens というものを設定する必要があるようです。
GitHub にログインして、generate Tokens を実行すると文字列が表示されるのでそれをテキストエディタかなんかに記録しておきます。
クローンしてみる
実際にクローンしてみます。
git clone https://github.com/moheno/homepage
ユーザー名とパスワードを要求されますが、パスワードのところにトークンの文字列を入力すればクローンが実行されます。
.
└── homepage
    ├── blog
    │   ├── __init__.py
    │   ├── admin.py
    │   ├── apps.py
    │   ├── context_processors.py
    │   ├── feeds.py
    │   ├── templates
    │   ├── templatetags
    │   ├── urls.py
    │   └── views.py
    ├── config
    │   ├── __init__.py
    │   ├── asgi.py
    │   ├── settings.py
    │   ├── urls.py
    │   └── wsgi.py
    └── manage.py
GitHub にファイルをアップすると、Netlify に簡単に設定できるのでとても便利とのこと。
Git の理解
Git ってもう少し複雑な使い方をするようです。
いきなり、プロジェクトを push するのではなくて、作業用のエリアで実際に動かした後で、エリアを少しずつ移動して最後に GitHub に push するのが流れみたいです。
- 作業ディレクトリ→ステージングエリア
- ステージングエリア→ローカルリポジトリ
- ローカルリポジトリ→リモートリポジトリ
GitHub にログインすると以下のようなコメントが表示されています。
create a new repository on the command line
echo "# helloworld" >> README.md
git init
git add README.md
git commit -m "first commit"
git branch -M main
git remote add origin git@github.com:moheno/helloworld.git
git push -u origin main
これを実行してみます。
以下のようなエラーが出ることがあります。
error: remote origin already exists.
その場合は、origin を削除します。でも origin って何だろう?
git remote rm origin
ssh 接続
git push -u origin main するために鍵認証します。
まずは鍵を作成します。
ssh-keygen -t ed25519 -N '' -C moheno -f ~/.ssh/moheno
そうすると、~/.ssh に moheno.pub が作成されます。
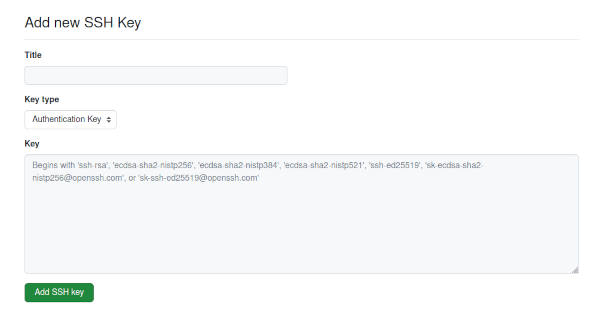
それをテキストエディタで開いて、その文字列を GitHub の ssh コードエリアにコピーペーストします。

このようにすると、「git push -u origin main」する際にパスワードを要求されないので簡単です。

